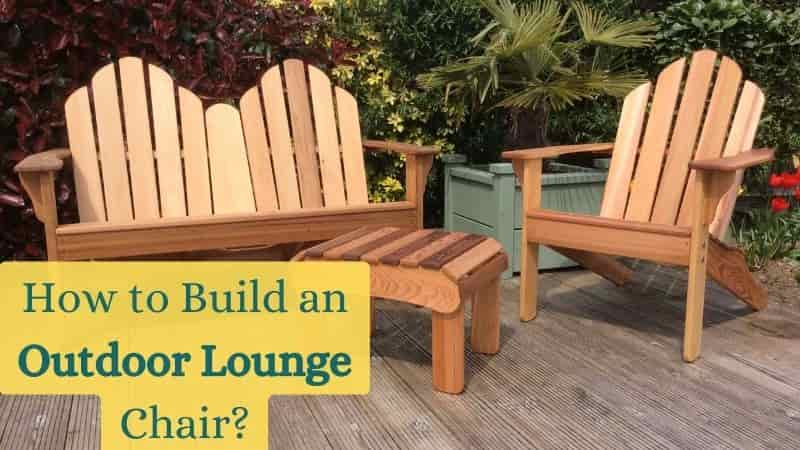
Outdoor lounge chairs are the epitome of relaxation. Whether you’re sunbathing, reading a book, or simply enjoying the fresh air, a comfortable chair can make all the difference. But why buy one when you can build your own customized version? Learning how to build an outdoor lounge chair can be both a fun and rewarding experience. So, let’s explore the steps to craft the perfect outdoor lounge chair.
Contents
A Step-By-Step Guide on How to Build an Outdoor Lounge Chair:

Step 1: Gathering Materials and Tools
Choosing the Right Wood for Your Outdoor Chair Lounge
When embarking on this DIY project, the first step is to select the ideal wood. Teak and cedar are top choices for outdoor furniture due to their resistance to weather elements. These woods ensure that your outdoor chaise lounge chairs remain durable and aesthetically pleasing for years. If you’re unsure about the type of wood to use, this guide on wooden outdoor chairs might be of help.
Why Wood Matters
The type of wood you choose plays a crucial role in the durability and aesthetics of your chair. Some woods are more resistant to weather conditions, while others offer a more luxurious finish.
Popular Wood Types
Essential Hardware for Your Modern Lounge Chair
Another crucial aspect is the hardware. The difference between an average and an awesome chair can be in the quality of screws and nails. Always choose weatherproof screws and nails for added durability. While you’re at it, remember to have a stock of sandpaper with varying grits, ranging from coarse to fine, and don’t forget a good-quality wood stain or paint. Both will serve as a protective layer against the elements and enhance the aesthetic appeal of your chair. If you’re new to this and need inspiration, consider checking out what is the most comfortable outdoor chair.
Tool List for Your Outdoor Chair Lounge Project
Before diving into the construction of your poolside chair, it’s crucial to gather all the necessary tools. A detailed tool list includes a saw, drill, hammer, and measuring tape. Additionally, you’ll need wood screws, wood glue, and sandpaper.
The Importance of Quality Fixatives in Your Outdoor Project
Opt for exterior wood glue, which offers a stronger bond than regular wood glue. Waterproof glue or polyurethane glue are also excellent choices for outdoor projects. Remember, the goal is to create a piece of furniture that can withstand the elements, so don’t skimp on quality.
Step 2: Design and Measurements
Sketching the Perfect Outdoor Chaise Lounge Chair
Well, the key to a successful DIY project lies in meticulous planning. Begin by sketching out your chair design. This helps visualize the end product and ensures that all the wood pieces fit together seamlessly.
Consider the recline angle of the chair. It’s more than just a design aspect—it’s a core feature ensuring comfort. Remember, the angle can determine whether your chair is a delight to sit in or merely a decorative piece.
Measuring and Marking
Measure and mark the wood pieces according to your design. This step ensures that your chair frame fits together seamlessly. For beginners, this guide on how to hang a hanging chair outdoors offers helpful resources on measurements and markings.
Incorporating Unique Features for Extra Seating Comfort
While the primary focus is on building a functional outdoor lounge chair, don’t forget about aesthetics and comfort. Consider adding features like adjustable backrest slats or armrests. For those looking to add a touch of luxury, upholstered lounge chairs with adult-sized chair cushions can be the perfect solution.
Step 3: Cutting the Wood
Precision in Every Cut for Your Outdoor Loungers
Using your detailed cut list and diagrams, begin by cutting the longest pieces first. It allows for easier management of the wood and makes sure you have a margin for error. For the chair’s back, cut two long pieces. Remember, these are crucial as they will determine the height of your outdoor chaise lounge. When it comes to the seat, cutting the slats according to your desired width is imperative. A perfect seat width ensures comfort, and isn’t that the whole point of a lounge chair? As for the legs, they serve as the foundation. You’ll need four sturdy pieces: two for the front and two for the back.
Sanding: The Key to a Smooth Finish
Once all the wood pieces, from the frame boards to the back slats, are cut, it’s time to focus on sanding. Sanding the edges of each piece ensures a smooth finish, preventing any potential splinters. Whether it’s the arm pieces or the seat slats, a straight board finish is crucial.
Step 4: Assembling the Base
Building a Strong Foundation with Leg Assembly
The foundation of your outdoor chaise lounge starts with the legs. Using wood screws and exterior wood glue, attach the leg pieces to the seat frame. The leg rail and seat rail joints should be firm, ensuring the base’s stability.
Ensuring Sturdiness for Long-lasting Outdoor Furniture
Once the legs are attached, it’s essential to ensure the base’s sturdiness. After all, this is the foundation of your lounge chair frame. Using a flat work surface can help in aligning the pieces correctly.
Step 5: Building the Backrest
Crafting the Perfect Backrest for Your Lounge Chair
The backrest is a pivotal component of your outdoor chair lounge, determining both comfort and aesthetics. Depending on your design, you might opt for an adjustable backrest, allowing for varied recline angles, or a fixed one. Using your detailed diagrams, cut the backrest slats, ensuring they fit perfectly within the chair frame.
Securing the Backrest to Your Lounge Chair Frame
Once the slats are cut and secured to the backrest frame using pocket hole screws, it’s time to attach the backrest to the base. Ensure that the backrest rail joints are firm and that the entire piece is aligned correctly.
Step 6: Finishing Touches
Achieving a Smooth Finish
With the main components of your outdoor chaise lounge chair assembled, it’s time to focus on the finishing touches. Sand the entire chair, from the arm pieces to the backrest slats, ensuring a smooth and splinter-free finish.
Protecting and Beautifying with Paint and Stain
To ensure your chair withstands the test of time and the elements, apply a coat of weather-resistant paint or wood stain. Not only does this step enhance the chair’s appearance, but it also offers additional protection against sun, rain, and wear.
Step 7: Adding Comfort
Add Cushions and Pillows:
While your DIY lounge chair is already a masterpiece, consider adding cushions or pillows for that extra touch of comfort. Opt for weather-resistant fabric to ensure longevity, whether you’re looking for chaise lounge cushions or simple throw pillows.
Revel in Your Achievement
Now, with your outdoor chaise lounge chair complete, it’s time to sit back, relax, and enjoy your handiwork. Whether you place it by the poolside, in your garden, or on your patio, it’s a testament to your craftsmanship and dedication.
Conclusion:
In this guide, we journeyed through the meticulous process of crafting a bespoke outdoor lounge chair, from selecting the right materials and tools to adding those final touches of comfort. From cutting to applying protective finishes, each step ensures your chair is both functional and aesthetically pleasing. Remember, with dedication and the right guidance, anyone can transform simple wood pieces into a masterpiece. So, embrace the challenge, trust the process, and soon, you’ll be relaxing in a chair that’s uniquely yours.
FAQ’s:
Q: What material is used for outdoor lounge chairs?
A: Outdoor lounge chairs are typically made from weather-resistant materials like teak, cedar, wicker, metal, or synthetic resins. These materials can withstand the elements and are easy to maintain.
Q: What is the best angle for a lounge chair?
A: The ideal angle for a lounge chair backrest is between 110 to 130 degrees. This angle offers optimal comfort for relaxation while maintaining good posture.
Q: How big of a patio do I need for a lounge chair?
A: The size of your patio should accommodate the lounge chair with enough space to move around comfortably. A typical lounge chair requires at least 6-8 feet in length and 3-4 feet in width, but always consider additional space for accessibility and other furniture.
Q: How deep should a lounge chair be?
A: A comfortable lounge chair typically has a depth (from front to back) of 20 to 24 inches. This depth allows most people to sit comfortably with their feet on the ground and their backs supported.

