
Contents
- 1 How to Make a Wooden Outdoor Chair: An Artful Guide to Enhancing Your Backyard
- 2 Assembling Your Arsenal: Essential Tools and Materials
- 3 Setting the Stage: Preparing Your Workspace
- 4 Unleashing Your Creativity: Deciding Your Chair Design
- 5 Becoming the Artisan: Constructing Your Chair
- 6 The Finishing Touch: Sanding and Painting
- 7 Caring for Your Creation: Maintaining Your Wooden Outdoor Chair
- 8 The Final Product: A Wooden Patio Chair for Your Outdoor Space
- 9 FAQs:
How to Make a Wooden Outdoor Chair: An Artful Guide to Enhancing Your Backyard
There’s a certain appeal to wooden outdoor chairs that no other outdoor furniture can match. They’re not just functional; they’re a symbol of artistry, perseverance, and unique style. Imagine basking in the summer sun, perched on a chair you’ve crafted yourself. This DIY patio chair project isn’t just a testament to your skills and creativity—it’s a reflection of your style.
This guide will serve as your treasure map to the rewarding world of woodworking. We’ll take you step by step through crafting an elegant wooden chair that will perfectly complement your outdoor space. With this guide in hand, you’ll not only learn how to make a wooden outdoor chair but also cultivate a hobby that could last a lifetime. Let’s embark on a journey of crafting that will enrich not just your backyard or deck but every corner of your home.
Assembling Your Arsenal: Essential Tools and Materials
The saying goes, “An artisan is only as good as their tools.” There’s truth in that; having the right tools and materials can make your project smoother and ensure your final product’s quality. Here’s what your toolkit should include:
Tools
- Saw (either a miter saw or circular saw)
- Hammer
- Screwdriver
- Sandpaper (with varying grits from rough to fine)
- Measuring tape
- Clamps
- Power drill
Materials
- Cedar boards (other weather-resistant woods like teak or redwood are excellent options too)
- Screws
- Wood glue
- Paint or wood finish
Don’t be intimidated by this list. These tools are investments, paving the way for countless DIY projects in your future. With them, you’ll have the power to create everything from outdoor side tables to charming outdoor coffee tables, all with your own hands.
Selecting the right materials will ensure the durability of your outdoor chair. Opt for weather-resistant woods to withstand the elements, ensuring your chair is the perfect project for summers to come.
Invest in quality tools—it’s worth it. They’ll make your woodworking easier, safer, and more precise.
Setting the Stage: Preparing Your Workspace
Safety and organization should be your priorities before beginning this hands-on project. A well-prepared workspace is the first step toward a successful DIY project.
Wear safety goggles to protect your eyes from flying wood particles, gloves to avoid splinters, and a mask to prevent inhalation of wood dust. Your workbench should be sturdy and spacious enough to accommodate your tools and the chair frame.
Consider your workspace a reflection of your thought process—clean and organized, leading to clear thinking and creativity.
Unleashing Your Creativity: Deciding Your Chair Design
With safety measures in place and a ready workspace, we can now dive into the fun part: deciding the design of your outdoor chair. This step is akin to choosing the ideal color for a room. Your choice can significantly influence the aesthetic and functionality of your outdoor space.
There are countless chair designs to consider, each offering unique charm and comfort. Two popular designs among DIY enthusiasts are the classic slatted back chair and the Adirondack chair.
Classic Slatted Back Chair Design:
This design is straightforward yet stylish, marked by its straight lines and versatility. It’s a simple project perfect for beginners, although it might not offer as much comfort as other designs.
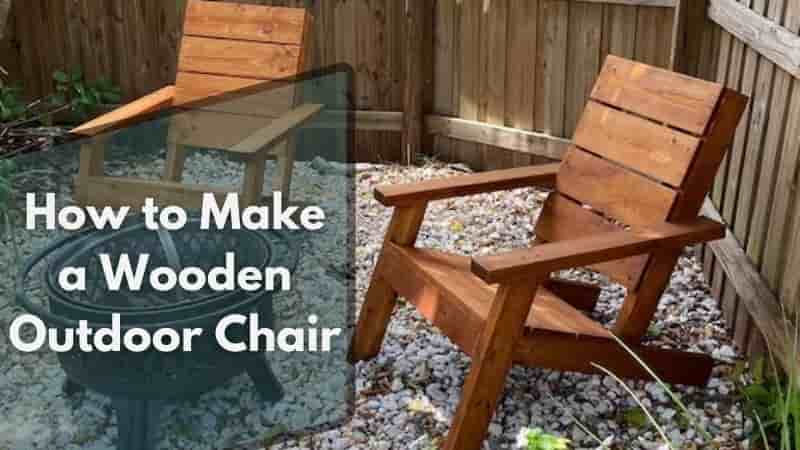
Adirondack Chair Design:
The Adirondack chair boasts a wide, reclined back, a deep seat, and wide armrests. It offers excellent comfort—ideal for leisurely afternoons on the patio. However, the unique shape might present a challenge to first-time woodworkers.
Choosing a design isn’t just about picking one you like—it’s about choosing a design that complements your outdoor space and elevates your outdoor dining experience. Your chair is more than a piece of furniture; it’s a testament to style and comfort.
Here’s a pro tip: Sketch out your design before you begin, taking note of measurements and any adjustments you need to make. This will provide you with a clear blueprint to work from, much like creating a seating plan before constructing your outdoor dining table.
Becoming the Artisan: Constructing Your Chair
Now we dive into the heart of our journey: constructing your wooden chair. From cutting the cedar board to securing the last screw, this process is a rewarding experience of learning and creativity.
1. Sketch and Measure:
Mark the design of your chair on your cedar board, noting all measurements carefully. Precision at this stage is critical—any errors here will affect the look and function of your chair.
2. Cut the Wood:
Use your saw to cut along the marked lines. This stage can be time-consuming and challenging, but remember; it’s okay to make mistakes. Much like applying wood filler, wood can be re-cut or adjusted.
3. Construct the Seat:
The seat is the core of your chair, so start here. Attach the side pieces to the front and back pieces using wood screws, ensuring they’re square and secure. Distribute the seat slats evenly across this frame and screw them in place.
It is recommended to drill pilot holes prior to driving in screws as a preventative measure against wood splitting.
4. Attach the Legs:
Next, attach the legs at the corners of the seat frame for maximum stability.
Safety Note: Ensure the screws are securely tightened to prevent wobbly legs.
5. Construct and Attach the Back:
For the chair back, attach the vertical slats to a top and bottom rail, then fix this to the seat. The angle you choose will determine the recline of the chair—consider what would be most comfortable for you.
6. Optional Add-ons: Armrests and Footrests:
Consider adding armrests or a footrest to enhance your chair’s comfort. Armrests can also offer additional stability.
7. Test the Chair:
Lastly, confirm that all parts are securely fastened, and the chair can bear weight.
Pro tip: Practice your cuts and assembly on scrap wood to reduce the chance of errors.
The Finishing Touch: Sanding and Painting
Constructing the chair is just one phase of the artistry—the finishing process adds character and style, much like adding cushions to a wooden bench.
Start by sanding the chair to smooth out any rough edges. Begin with coarse sandpaper, gradually moving to finer grits for an even finish.
Next is the painting or wood finish process. Like choosing the color for your outdoor side tables, this step will greatly influence your chair’s final appearance.
When choosing a paint or wood finish, consider your outdoor decor and the type of wood you’ve used. Some finishes can enhance the wood’s natural color and grain, while others provide a vibrant color. Remember to apply several coats of paint for a durable and polished look.
Caring for Your Creation: Maintaining Your Wooden Outdoor Chair
Your newly crafted chair isn’t just a display of your skills and creativity—it’s an investment in your outdoor space. Like taking care of your outdoor cushions, maintaining your chair will ensure its charm and utility for many seasons.
Regular maintenance is simple: clean the chair periodically to remove dust and debris. If you’ve painted the chair, check for chips and scratches and touch them up as needed. Wood finishes may require reapplication over time to maintain water and UV resistance.
Consider seasonal care for your chair. During harsh weather, it may be best to move your chair indoors or cover it up to preserve its longevity.
The Final Product: A Wooden Patio Chair for Your Outdoor Space
Following this step-by-step guide will help you create a stunning wooden outdoor chair that can become the centerpiece of your patio. With high-quality materials, accurate measurements, and meticulous attention to detail, your DIY patio chair will be a testament to your creativity and craftsmanship.
So, get your tools ready, and let’s get crafting! After all, there’s nothing like enjoying the summer sun and quality time outdoors on a patio chair that you built with your own hands. Plus, a DIY chair is an excellent complement to your outdoor dining table, adding a personal touch to your outdoor dining experience. Whether it’s a chair for your deck or your garden, this simple project is the perfect way to spend the coming weekends.
FAQs:
Q1: What type of wood is best for an outdoor chair?
A1: Hardwoods such as cedar, teak, or oak are excellent options for outdoor furniture. They are naturally durable and weather resistant, making them excellent options for a simple project.
Q2: Can I customize the chair’s design?
A2: Absolutely! You can adjust the design to fit your preferences. For example, you can experiment with pocket holes or use a wood pallet for a unique touch.
Q3: Do I need advanced woodworking skills to make this chair?
A3: While some basic woodworking skills are beneficial, this guide offers a step-by-step walkthrough, making it a perfect project for beginners.