Can you paint a leather chair? Yes, you absolutely can! Painting a leather chair is a great way to refresh its appearance, change its color, or even restore a beloved piece of furniture that has seen better days. This comprehensive guide will walk you through every step of the process, from preparing the leather to applying the final coat of sealant, ensuring a professional-looking and long-lasting finish. Whether you’re looking for a leather chair painting tutorial, the best paint for leather furniture, or advice on painting leather without cracking, this guide has you covered.
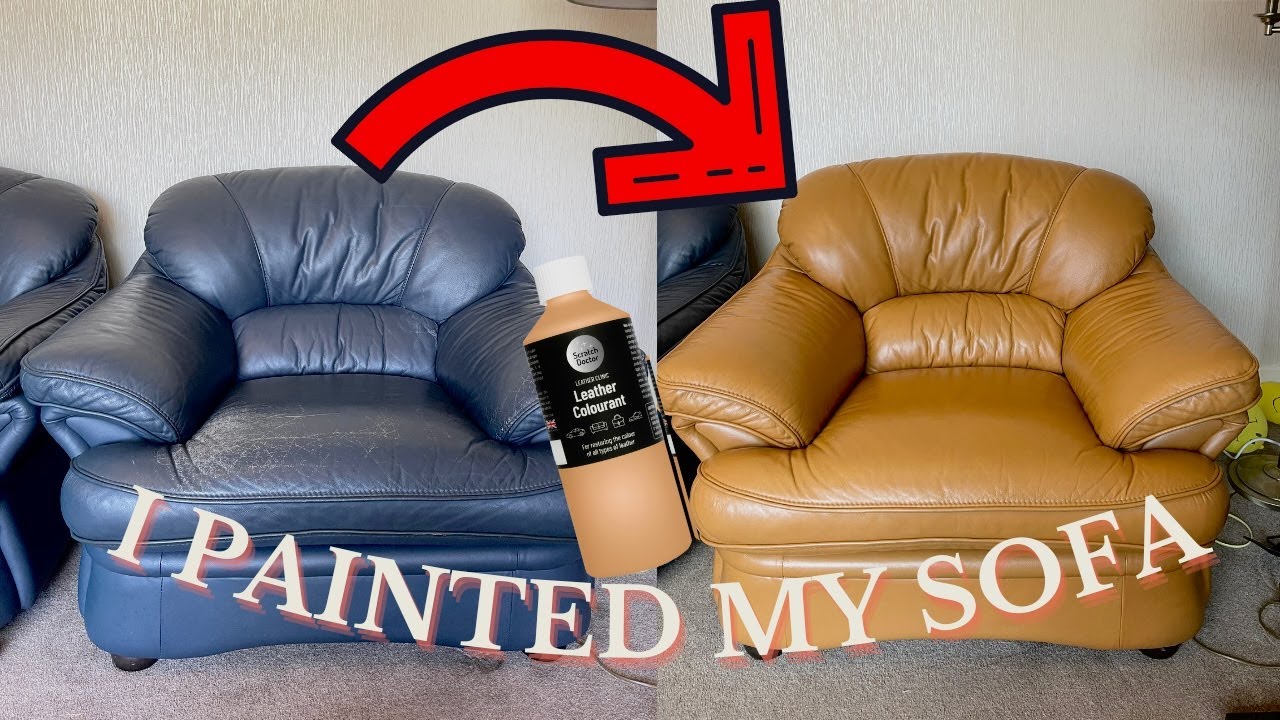
Image Source: i.ytimg.com
Is Leather Chair Painting Right for You?
Before diving into a leather chair color change, it’s important to weigh the pros and cons. Painting is best suited for chairs with color fading, minor scratches, or when you simply want a new look.
Here’s when painting is a good option:
- Color Change: You want to completely alter the chair’s color.
- Minor Imperfections: To cover small scratches, scuffs, or fading.
- Cost-Effective Refresh: Cheaper than reupholstering or buying a new chair.
However, consider alternatives if:
- Significant Damage: Deep cracks, tears, or heavily damaged leather might require professional repair or reupholstering.
- High-End Leather: For very expensive or antique leather pieces, consult a professional to avoid damaging the original material.
- Maintaining Value: Painting might decrease the value of certain antique or collectible leather chairs.
Tools and Materials: What You’ll Need
Having the right supplies is half the battle. Here’s a checklist of essential tools and materials for successful leather chair painting:
- Leather Cleaner: For removing dirt, oils, and previous finishes.
- Leather Deglazer/Preparer: To strip the existing finish and create a better surface for paint adhesion.
- Soft Cloths or Microfiber Towels: For cleaning and applying products.
- Sandpaper (Various Grits): Fine-grit (220-400) for light sanding and smoothing.
- Painter’s Tape: For masking off areas you don’t want to paint.
- Leather Paint: Specifically designed for leather and flexible enough to prevent cracking.
- Leather Paint Sealer/Topcoat: To protect the paint and provide a durable finish.
- Paintbrushes or Foam Brushes: For applying paint and sealer.
- Spray Gun (Optional): For a smoother, more even finish (especially for larger projects).
- Drop Cloths or Plastic Sheeting: To protect your work area.
- Leather Conditioner: For moisturizing the leather after painting.
- Safety Glasses and Gloves: To protect your eyes and skin.
Preparing Leather for Painting: The Key to Success
Proper preparation is the most crucial step in any leather chair painting tutorial. It ensures the paint adheres correctly and lasts longer. Rushing this step can lead to cracking, peeling, or an uneven finish.
Here’s a detailed breakdown of how to prepare your leather chair for painting:
- Clean the Leather: Use a specialized leather cleaner to remove all dirt, grime, oils, and previous treatments from the surface. Apply the cleaner according to the product instructions, and wipe thoroughly with a clean, soft cloth. Repeat if necessary.
- Deglaze the Leather: This step is essential for removing the existing finish and creating a porous surface that the paint can grip. Apply a leather deglazer or preparer to the entire surface of the chair, following the manufacturer’s instructions. This usually involves applying the product with a cloth and letting it sit for a few minutes before wiping it off.
- Lightly Sand the Leather: Use fine-grit sandpaper (220-400 grit) to gently sand the leather surface. This will further roughen the surface and improve paint adhesion. Be careful not to apply too much pressure, as you don’t want to damage the leather.
- Remove Sanding Dust: After sanding, thoroughly wipe the chair with a clean, damp cloth to remove all sanding dust. Allow the leather to dry completely before proceeding.
- Tape Off Areas: Use painter’s tape to mask off any areas you don’t want to paint, such as wooden legs, trim, or buttons.
Selecting the Best Paint for Leather Furniture
Choosing the right paint is crucial for achieving a durable and attractive finish. Not all paints are created equal, and using the wrong type can result in cracking, peeling, or an uneven appearance.
Here are the key factors to consider when selecting paint for your leather chair:
- Flexibility: Leather is a flexible material, so the paint must also be flexible to move with the leather without cracking. Look for paints specifically designed for leather or flexible acrylic paints.
- Adhesion: The paint must adhere strongly to the leather surface to prevent peeling. Proper preparation, including cleaning and deglazing, is essential for good adhesion.
- Durability: The paint should be durable enough to withstand everyday wear and tear, including rubbing, scratching, and cleaning.
- Colorfastness: The paint should be colorfast, meaning it won’t fade or bleed over time.
- Finish: Consider the desired finish, such as matte, satin, or gloss.
Types of Leather Paint:
| Paint Type | Pros | Cons | Best For |
|---|---|---|---|
| Acrylic Leather Paint | Flexible, durable, wide range of colors, easy to apply | Can be prone to cracking if applied too thickly | General leather chair painting, DIY projects |
| Leather Dye | Penetrates the leather for a natural look, good for color changes | Can be messy to apply, requires more preparation, limited color options | Subtle color changes, restoring aged leather |
| Urethane Leather Paint | Highly durable, water-resistant, excellent for high-wear areas | Less flexible than acrylic, can be more difficult to apply, may require special equipment | Commercial furniture, areas prone to spills and heavy use |
| Chalk Paint | Matte finish, easy to distress for a vintage look | Requires sealant for durability, not as flexible as acrylic | Distressed leather chair painting, creating a rustic aesthetic |
Step-by-Step: How to Paint a Leather Chair
Now that you’ve gathered your supplies and prepared the leather, it’s time to start painting! Follow these steps for a professional-looking finish:
- Apply the First Coat: Using a brush, foam brush, or spray gun, apply a thin, even coat of leather paint to the entire surface of the chair. Work in small sections and avoid applying too much paint at once, as this can lead to cracking.
- Let it Dry: Allow the first coat of paint to dry completely according to the manufacturer’s instructions. This usually takes several hours.
- Lightly Sand (Optional): After the first coat is dry, you can lightly sand the surface with fine-grit sandpaper (400 grit) to smooth out any imperfections. Be gentle and avoid removing too much paint.
- Remove Sanding Dust: Wipe the chair with a clean, damp cloth to remove any sanding dust.
- Apply Additional Coats: Apply additional thin coats of paint, allowing each coat to dry completely before applying the next. The number of coats required will depend on the color of the paint and the desired level of coverage. Typically, two to three coats are sufficient.
- Allow to Dry Completely: After applying the final coat of paint, allow the chair to dry completely for at least 24 hours.
Sealing and Protecting Your Painted Leather Chair
Once the paint is completely dry, it’s essential to seal it with a leather paint sealer or topcoat. This will protect the paint from wear and tear, prevent cracking, and provide a durable finish.
- Apply the Sealer: Using a brush, foam brush, or spray gun, apply a thin, even coat of leather paint sealer to the entire surface of the chair. Follow the manufacturer’s instructions for application.
- Let it Dry: Allow the sealer to dry completely according to the manufacturer’s instructions.
- Apply Additional Coats (Optional): For added protection, you can apply additional coats of sealer, allowing each coat to dry completely before applying the next.
- Allow to Cure: After applying the final coat of sealer, allow the chair to cure for at least 48-72 hours before using it. This will allow the sealer to fully harden and provide maximum protection.
Restoring Leather Chair with Paint: Special Considerations
If you’re restoring a distressed leather chair with paint, here are some special considerations:
- Address Damage First: Before painting, repair any significant damage, such as tears or deep cracks, with leather filler or repair kits.
- Embrace Imperfections: If you’re going for a rustic or vintage look, don’t worry about completely covering all imperfections. Leaving some of the original character can add to the charm of the piece.
- Distressing Techniques: After painting, you can use sandpaper or other tools to distress the paint and create a worn or aged appearance.
- Highlight Details: Consider using different paint colors or techniques to highlight specific details, such as nailheads, stitching, or carvings.
How to Condition Leather After Painting
After painting and sealing, the leather may become dry or stiff. Conditioning the leather will help to restore its moisture and flexibility, preventing cracking and prolonging its lifespan.
- Apply Leather Conditioner: Apply a high-quality leather conditioner to the entire surface of the chair, following the manufacturer’s instructions.
- Massage into the Leather: Gently massage the conditioner into the leather with a soft cloth.
- Allow to Absorb: Allow the conditioner to absorb into the leather for at least 30 minutes.
- Wipe Off Excess: Wipe off any excess conditioner with a clean, soft cloth.
- Repeat Regularly: Condition the leather regularly, every few months, to keep it looking and feeling its best.
Painting Leather Without Cracking: Expert Tips
Cracking is a common concern when painting leather. Here are some expert tips to minimize the risk of cracking:
- Use Flexible Leather Paint: As mentioned earlier, choosing a paint specifically designed for leather is crucial. These paints are formulated to be flexible and move with the leather without cracking.
- Apply Thin Coats: Applying multiple thin coats of paint is better than applying one thick coat. Thin coats dry more evenly and are less likely to crack.
- Avoid Over-Stretching the Leather: Be careful not to over-stretch the leather while painting, as this can cause the paint to crack.
- Condition the Leather Regularly: Keeping the leather moisturized will help to prevent it from drying out and cracking.
- Avoid Extreme Temperatures: Avoid exposing the painted leather chair to extreme temperatures or direct sunlight, as this can cause the paint to dry out and crack.
- Test in an Inconspicuous Area: Before painting the entire chair, test the paint and sealer in an inconspicuous area to ensure compatibility and desired results.
Leather Furniture Refinishing: Beyond Painting
While painting is a common method for refinishing leather furniture, it’s not the only option. Here are some other techniques to consider:
- Leather Dyeing: Leather dyeing involves penetrating the leather with a dye, rather than applying a surface coating like paint. This can provide a more natural look and feel.
- Leather Repair: For minor damage, such as scratches or scuffs, leather repair kits can be used to restore the surface without painting.
- Leather Cleaning and Conditioning: Sometimes, all your leather furniture needs is a thorough cleaning and conditioning to restore its appearance.
- Reupholstering: For heavily damaged or worn leather furniture, reupholstering may be the best option.
Frequently Asked Questions (FAQ)
Q: What is the best way to clean leather before painting?
A: Use a specialized leather cleaner to remove dirt, oils, and previous finishes. Follow the product instructions carefully and wipe thoroughly with a clean, soft cloth.
Q: Can I use regular acrylic paint on leather?
A: While some people have had success with regular acrylic paint, it’s generally not recommended. Leather paint is specifically formulated to be flexible and adhere to leather, while regular acrylic paint can be prone to cracking and peeling.
Q: Who can I hire to paint a leather chair?
A: You can hire furniture refinishers, leather repair specialists, or professional painters experienced in working with leather. Look for professionals with positive reviews and a portfolio of successful projects.
Q: What if the paint cracks after I’ve painted the chair?
A: If the paint cracks, you can try lightly sanding the affected areas and applying a new coat of flexible leather paint. Make sure to condition the leather regularly to prevent further cracking.
Q: How long does it take to paint a leather chair?
A: The time it takes to paint a leather chair depends on the size and complexity of the chair, as well as the number of coats of paint and sealer required. Generally, it can take anywhere from a few days to a week to complete the project, including preparation, painting, sealing, and curing time.
Q: How do I maintain a painted leather chair?
A: To maintain a painted leather chair, clean it regularly with a mild soap and water solution and condition it every few months with a high-quality leather conditioner. Avoid exposing the chair to extreme temperatures or direct sunlight, and protect it from scratches and abrasions.
Hello, I’m Muzammil Siddiqui, the mind behind ChairsFly.com.. With a deep passion for chairs and a wealth of expertise, I created this platform to share my insights, experiences, and knowledge about everything chair-related. From ergonomic solutions to stylish designs, my goal is to guide you in finding the perfect seat for your needs. Let’s embark on this journey of comfort and elegance together!