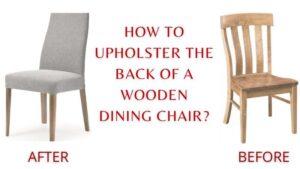
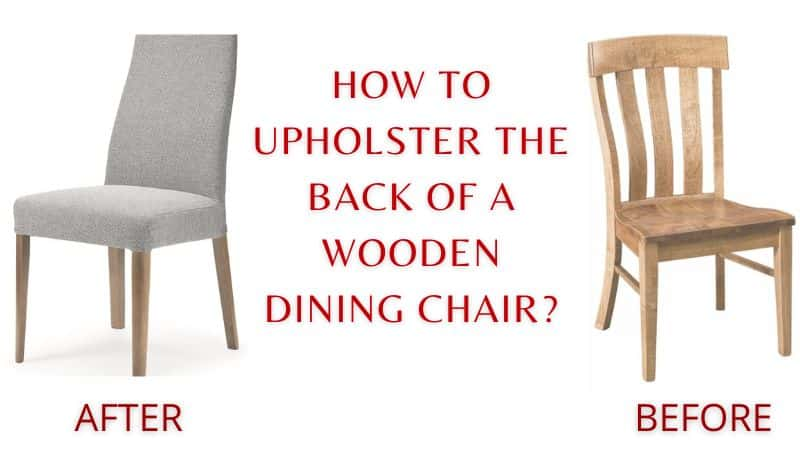
You have a wooden dining chair that could use some sprucing up. You want to make it look new and stylish and you think upholstering the back of it would be the perfect way to do this!
Upholster the back of a wooden dining chair can be daunting, especially if you lack experience in this area. Common challenges people encounter include not having enough materials on hand, not being sure how to prepare the old chair for upholstery, not knowing how to accurately cut out pieces of foam and fabric for the project, difficulty attaching all four sides of fabric securely with a staple gun, and excess extra fabric that needs trimming away.
Contents
- 1 The Basics of How to Upholster the Back of a Wooden Dining Chair in 7 Steps
- 2 1. Gather the necessary material
- 3 2. Prepare the chair by removing any existing material from the back of it
- 4 3. Cut out pieces of upholstery foam to fit onto the back of the chair Seat
- 5 4. Place the Cut Pieces onto the Chair’s Frame
- 6 5. Use a staple gun to attach all four sides of the fabric to the frame securely
- 7 6. Finish off by trimming away excess fabric
- 8 7. Enjoy your newly upholstered wood dining chairs
- 9 Conclusion
- 10 FAQ
The Basics of How to Upholster the Back of a Wooden Dining Chair in 7 Steps
We understand how daunting it can be to upholster the back of wooden dining chairs, especially if you don’t have any experience in this area. That’s why we’ve created this step-by-step guide on how to do it properly – so that you can confidently and successfully upholster your own furniture!
1. Gather the necessary material
It is essential to gather the necessary materials before beginning the process of upholstering the back of a wooden dining chair. The selection of materials will depend on your unique preferences and what you would like to do with the chair overall. Generally speaking, you will need fabric (usually an upholstery grade), upholstery foam, and tools.
Fabric:
You can select a patterned or original fabric for the chair, depending on your own personal style and needs. Generally speaking, upholstery-grade fabrics are best for this project as they are typically thick enough and durable to hold staples securely without ripping.
Upholstery Foam:
Upholstery foam comes in a variety of thicknesses and can be purchased from fabric stores or online vendors. When selecting the foam, you should consider how much cushioning you want for the back of the chair seats and if durability is an important factor.
Tools:
To complete the project, you will need a variety of tools like a ruler, scissors or knife, pins or staples, and a staple gun. All of these can be purchased at hardware stores or other stores that sell upholstery supplies.
2. Prepare the chair by removing any existing material from the back of it
Removing any existing material from the back of a wooden dining chair is an important step in upholstering. This part of the process serves two main purposes: it makes the surface of the chair smoother for attaching new materials, and it removes any dirt, dust, or debris that may have accumulated on the chair over time.
Here are some tips for removing an old fabric or any existing material from the back of the chair:
Inspect the Chair for Loose Materials
Before you begin removing an old fabric or any existing materials from the back of the chair, it’s important to inspect it thoroughly to ensure that there are no loose components such as nails, screws, or staples that need to be removed first.
Use a Screwdriver & Pliers
If there are screws, nails, or staples present on the chair’s back, you should use a screwdriver and/or pliers to carefully remove them. Be sure to take extra caution when doing this as it can be easy to damage the chair if you are not careful.
Use a Putty Knife
If there is any old upholstery fabric present on the back of your chair, it’s a good idea to use a putty knife or electric knife to carefully scrape away at it. This will help loosen and remove any stubborn material that may be stuck to the chair’s frame.
Vacuum Away the Remaining Bits
After you have removed all of the existing material from the back of your chair, it’s important to vacuum away any remaining bits or particles that may be left behind. This will help ensure that everything is as clean as possible before you begin upholstering the back of your chair.
3. Cut out pieces of upholstery foam to fit onto the back of the chair Seat
Cutting out pieces of upholstery foam to fit onto the back of a wooden dining chair is an essential step in the process of upholstering. The pieces of foam should be cut to the exact size and shape of the chair’s frame, as this will provide extra cushioning and support for your chair seat. Additionally, it will help protect the new fabric upholstery from getting ripped or torn over time.
Measure the Chair’s Frame
Before you begin, it is important to measure the frame of the chair so that you can accurately cut out pieces of foam. You should measure both length and width and take into account any curves or angles in the frame.
Cut Out Pieces of Upholstery Foam
Once you have accurately measured the chair’s frame, you can begin cutting out pieces of upholstery foam to fit it. It is best to use a sharp utility knife or scissors for this step and make sure that each piece fits securely on the frame without any gaps.
4. Place the Cut Pieces onto the Chair’s Frame
Once all of the pieces of new foam have been cut out, you can move on to placing them onto the frame of the chair. You should make sure that each piece fits snugly and is secured with either pins or staples. This will ensure that the pieces do not move or shift once the fabric is attached.
5. Use a staple gun to attach all four sides of the fabric to the frame securely
Using a staple gun to attach all four sides of the fabric to the frame securely is an essential step in upholstering a wooden dining chair. A staple gun ensures that the fabric will stay firmly secured to the frame, which helps to prevent it from shifting or becoming loose over time.
6. Finish off by trimming away excess fabric
One of the most important steps in upholstering a wooden dining chair is finishing off by trimming away any excess fabric. This step serves two main purposes: it helps to ensure that the fabric fits snugly onto the frame, and it helps create a clean and professional look.
Choosing the Right Tool to Trim Excess Fabric
When it comes to trimming away the excess fabric, you should always use the right tool. Scissors or a razor blade work well for this task, as they provide precise and even cuts. Make sure to be careful when using these tools, as an imprecise cut could result in fraying or damage to the fabric.
Tips on How to Make Clean and Professional Cuts
To make clean and professional cuts when trimming away the excess fabric, it is important to use a ruler or measuring tape. This will help you ensure that each cut is even and precise. Additionally, it is best to take your time when making these cuts as rushing could result in mistakes.
If You are still in trouble or still want to know how to upholster the back of a wooden dining chair, you can watch this guide.
7. Enjoy your newly upholstered wood dining chairs
Once you have successfully upholstered the back of your dining room chair, it is important to take the time to enjoy and appreciate your hard work. There’s nothing quite like admiring the beauty and comfort that a freshly upholstered chair can bring to any space. Not only will a newly upholstered chair add charm and sophistication to your dining room, but it will also provide a comfortable place for you, your family, and your friends to sit. So take the time to enjoy the fruits of your labor and bask in the satisfaction of having completed such an ambitious project!
Conclusion
Upholstering the back of wooden dining chairs can be an intimidating task, but with careful planning and attention to detail, it is definitely doable. The key steps in this process include gathering material, preparing the chair by measuring its frame, cutting out pieces of upholstery foam that fit snugly on the frame, using a staple gun to attach all four sides of fabric securely, and trimming away excess fabric for a clean look. With these tips in mind, you’ll soon have your own stylishly upholstered wood dining chairs ready to complete any room.
FAQ
How do you cover the back of a dining chair?
To cover the back of a dining chair, you’ll need to measure the frame, cut out pieces of upholstery foam, secure the fabric with pins or staples, and use a staple gun to attach all four sides of the fabric. Finally, trim away any excess fabric for a clean look.
What is the most important step when upholstering dining chairs?
The most important step when upholstering chairs is using a staple gun to attach all four sides of the fabric securely. A staple gun ensures that the fabric stays firmly secured to the frame, which helps to prevent it from shifting or becoming loose over time.
How do you reupholster a dining room chair without sewing?
You don’t need to sew when reupholster dining chairs. Instead, you can use pins or staples to secure the fabric onto the frame and then use a staple gun to attach all four sides of the fabric securely. This will ensure that the fabric stays firmly in place without needing any sewing.
How can I reupholster a dining chair seat?
The process for reupholstering a dining room chair seat is similar to that of upholstering the back of a dining chair. Start by measuring the frame, cutting out pieces of upholstery foam, securing the fabric with pins or staples, and using a staple gun to attach all four sides of the fabric securely. Finally, trim away excess fabric for a clean look.
What is the best way to cut fabric for upholstering chairs?
The best way to cut fabric for upholstering chair is by using a ruler or measuring tape and scissors or a razor blade. Taking your time when making these cuts will ensure that you get precise and even pieces every time. Additionally, it’s important to make sure that the fabric is completely clean and without any fraying or damage before cutting.