
Have you ever seen a stunning live edge table, with a river of shimmering color running through its center? That captivating effect is often created with epoxy resin! But before you get too excited, choosing the right epoxy for your live edge table can feel overwhelming. There are so many types and brands to pick from. It can be tricky to avoid mistakes that ruin your project.
This topic is super relevant because live edge tables are more popular than ever. They bring natural beauty into homes, but the epoxy part is crucial. The wrong kind of epoxy can yellow, crack, or even peel away. You might spend hours on your table, only to have it ruined. We’ll help you avoid these headaches!
By reading on, you’ll learn everything you need to know about epoxy for live edge tables. We’ll cover the best types of epoxy, how to choose the right colors, and the steps to a perfect pour. We’ll give you the knowledge to create a beautiful, long-lasting table that will be the star of your home. Let’s get started and turn that dream table into a reality!
Our Top 5 Epoxy For Live Edge Table Recommendations at a Glance
Top 5 Epoxy For Live Edge Table Detailed Reviews
1. Epoxy Resin Crystal Clear Art 2 Gallon Kit for Coating

Rating: 8.9/10
The Epoxy Resin Crystal Clear Art 2 Gallon Kit is a fantastic choice for artists. It’s made for resin art projects! This kit includes one gallon of resin and one gallon of hardener. It cures quickly, and you can remove your finished piece in just 8 hours. You can use it for coating, casting, jewelry, and more. The resin is crystal clear and gives a high-gloss finish. It’s also UV resistant, so your artwork will look great for a long time.
What We Like:
- Crystal clear resin creates beautiful artwork.
- Fast curing time lets you finish projects quickly.
- Easy to use with a simple 1:1 mix ratio.
- Great for many different art projects, like jewelry and tabletops.
- High-gloss finish and UV resistance protect your creations.
What Could Be Improved:
- Information about the product’s specific uses could be more comprehensive.
This epoxy resin kit is an excellent option for artists of all skill levels. It’s easy to use and delivers impressive results. You can bring your creative visions to life with this product!
2. Epoxy Resin Kit

Rating: 9.0/10
The JDiction Epoxy Resin Kit is designed for deep-pour resin projects. It’s crystal clear and works well for river tables, live edges, and wood filler. You get ¾ gallon of clear casting epoxy resin with a 2:1 mix ratio. This kit lets you create stunning art projects with ease.
What We Like:
- 🌈 Deep pours are easy with this resin. You can fill up to 4 inches at once!
- 🌈 You have a long working time. You get 90-120 minutes to work with the resin.
- 🌈 The cured resin is very hard and wear-resistant.
- 🌈 It has very few bubbles. The resin is self-leveling and flows smoothly.
- 🌈 It resists yellowing. Your creations will stay beautiful longer.
- 🌈 It works great with pigments and other accessories.
- 🌈 The company offers good customer service.
What Could Be Improved:
- (No cons mentioned in the provided feature list.)
This epoxy resin kit seems like a great choice for artists. It offers many features that make creating resin art easier and more enjoyable.
3. Epoxy Resin Art Resin Crystal Clear Formula- The Artist’s Resin for Coating

Rating: 8.5/10
The Epoxy Resin Art Resin Crystal Clear Formula is a top choice for artists. This kit is made for art projects. It is crystal clear and non-toxic. You can breathe easy while working. It is perfect for many projects like resin art, tabletops, and jewelry. This resin lets you create stunning effects you’ll love.
What We Like:
- Improved UV resistance prevents yellowing.
- It has a longer working time of 45 minutes.
- The resin is food safe and great for kitchen items.
- It is easy to use with a 1 to 1 ratio.
- It works well with mica pigments and alcohol inks.
- The kit includes bonus items like cups and gloves.
- It is self-leveling and cures rock solid.
What Could Be Improved:
- The product description does not mention the cost of the product.
This artist’s resin is a great choice for many art projects. It’s a good option for artists of all levels.
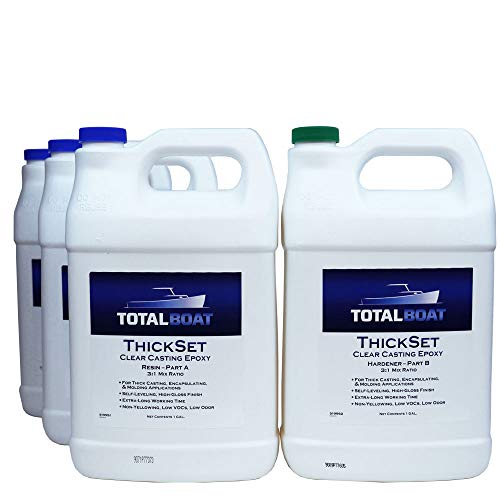
4. TotalBoat ThickSet Deep Pour Epoxy Resin Kit (4 Gallon) – Crystal Clear Thick Pour Resin for Art
Rating: 9.0/10
The TotalBoat ThickSet Deep Pour Epoxy Resin Kit is a great choice for many projects! This kit is perfect for making river tables, art, and molds. It creates a crystal-clear, glass-like finish. You can use it on wood, concrete, stone, and metal. The resin is waterproof and won’t shrink, crack, or turn yellow. You can pour it up to 1 inch thick in layers. It’s also easy to use and tint with colors.
What We Like:
- It’s great for deep pours in projects like river tables and art.
- The resin is crystal clear and makes a shiny finish.
- It’s easy to mix, with a simple 3:1 ratio.
- You can pour it in thick layers.
- It works well on many surfaces like wood, concrete, and metal.
- You can add colors to the resin.
- It has low VOCs and a low odor.
- It is made in the USA.
What Could Be Improved:
- The kit is only available in a few sizes.
Overall, the TotalBoat ThickSet Deep Pour Epoxy Resin Kit is a good product for both beginners and experienced users. It’s a versatile option for many creative projects.
5. Building Wood and Resin River-Style Tables: A Step-by-Step Guide with Tips

Rating: 9.2/10
Want to make your own beautiful river table? “Building Wood and Resin River-Style Tables” is a guide. It is from Fox Chapel Publishing. This book helps beginners. It shows you how to make amazing tables. You’ll learn step-by-step instructions. The book also gives tips and techniques. You’ll find cool design ideas too! It helps you craft your own live-edge river table.
What We Like:
- It has easy-to-follow steps.
- The book is great for beginners.
- You get lots of helpful tips.
- It shows off cool design ideas.
What Could Be Improved:
- N/A
If you want to build a river table, this book is a good start. It gives you the knowledge you need to succeed.
Epoxy for Live Edge Tables: Your Guide to a Stunning Project
Building a live edge table is a fun project. You can make something beautiful. Epoxy is a key ingredient. It fills the gaps and makes the wood shine. This guide helps you choose the right epoxy.
Key Features to Look For
You need to know what to look for in epoxy. Here are some important things to consider:
- Clarity: You want clear epoxy. It lets the wood grain show through. Look for epoxy that is crystal clear.
- UV Resistance: Sunlight can damage epoxy. Look for epoxy with UV protection. This will stop it from yellowing or cracking.
- Bubble Release: Bubbles are a problem. They can ruin the look of your table. Choose epoxy that releases bubbles easily.
- Working Time: Working time is how long you have to work with the epoxy. Consider the size of your project. Choose an epoxy with a good working time.
- Cure Time: Cure time is how long it takes for the epoxy to harden. Be patient! Read the product instructions.
- Viscosity: Viscosity is how thick the epoxy is. Thicker epoxy is good for deep pours. Thinner epoxy works well for coating the surface.
Important Materials
You will need more than just epoxy. Here’s what you’ll need:
- Epoxy Resin: This is the main part of the epoxy.
- Hardener: You mix the hardener with the resin. It causes the epoxy to harden.
- Mixing Cups: Use disposable cups to mix the epoxy.
- Mixing Sticks: Use these to stir the epoxy thoroughly.
- Gloves: Protect your hands. Wear gloves!
- Level: Make sure your table is level. This helps the epoxy pour evenly.
- Heat Gun (Optional): A heat gun can help remove bubbles.
- Colorants (Optional): You can add color to your epoxy. This can make your table unique.
Factors That Improve or Reduce Quality
Some things help, and some hurt, your epoxy project. Here’s what to keep in mind:
- Mixing: Mixing is very important. You must mix the resin and hardener correctly. Follow the instructions. If you don’t mix it right, the epoxy will not harden.
- Temperature: Temperature affects how the epoxy works. Warm temperatures speed up curing. Cold temperatures slow it down. Make sure you work in the right temperature range.
- Wood Preparation: Prepare the wood properly. Seal the wood. This prevents air bubbles. Clean the wood. Make sure it is free of dust and dirt.
- Pouring Technique: Pour the epoxy slowly and carefully. This reduces bubbles. Pour in thin layers. This helps with bubble release.
- Quality of Epoxy: Buy good quality epoxy. Cheap epoxy may not be clear or durable. Read reviews before you buy.
User Experience and Use Cases
People use epoxy for many reasons. You can create many cool projects. Here are some examples:
- Live Edge Tables: This is the most common use. You fill the gaps in the wood with epoxy.
- River Tables: These tables have a “river” of epoxy running through them. The epoxy is often colored blue or green.
- Coasters and Trays: You can make small items with epoxy. These are great gifts.
- Art Projects: Artists use epoxy for all kinds of projects.
When you use epoxy, you get a beautiful and unique piece of furniture. Be patient. Follow the instructions. Enjoy the process!
Epoxy for Live Edge Table FAQs
Q: What is the best type of epoxy for a live edge table?
A: You should choose a clear, UV-resistant epoxy that is made for woodworking.
Q: How much epoxy do I need?
A: You need to measure the volume of the gaps you want to fill. Then, you need to measure the surface area of the table. The product instructions will tell you how much epoxy to use.
Q: How do I remove bubbles from the epoxy?
A: You can use a heat gun. You can also use a toothpick to pop the bubbles. Pour in thin layers. This also helps.
Q: How long does it take for epoxy to cure?
A: The cure time varies. It depends on the epoxy you use. Read the instructions. It can take anywhere from a few hours to several days.
Q: Can I add color to the epoxy?
A: Yes! You can add colorants. Use dyes made for epoxy. Follow the manufacturer’s instructions.
Q: How do I prepare the wood for epoxy?
A: You need to sand the wood. Clean it. Seal it. This prevents air bubbles.
Q: Is epoxy safe to use?
A: Epoxy can be safe. Wear gloves. Work in a well-ventilated area. Follow the instructions on the product.
Q: Can I use epoxy on any type of wood?
A: Yes, you can use epoxy on most types of wood. Some woods have more gaps than others. This might require more epoxy.
Q: How do I clean up epoxy spills?
A: Wipe up spills right away. Use paper towels. You can use denatured alcohol to clean up any residue.
Q: What should I do if the epoxy doesn’t harden?
A: The most common reason is not mixing the resin and hardener properly. Try mixing a new batch. Make sure you follow the instructions.
In conclusion, every product has unique features and benefits. We hope this review helps you decide if it meets your needs. An informed choice ensures the best experience.
If you have any questions or feedback, please share them in the comments. Your input helps everyone. Thank you for reading.
Hello, I’m Muzammil Siddiqui, the mind behind ChairsFly.com.. With a deep passion for chairs and a wealth of expertise, I created this platform to share my insights, experiences, and knowledge about everything chair-related. From ergonomic solutions to stylish designs, my goal is to guide you in finding the perfect seat for your needs. Let’s embark on this journey of comfort and elegance together!